
Appearance
Equipment and materials
Shooting film needs two things: a working camera and a roll of film. Beyond those two essentials, a few extras make the process easier, more consistent, or more enjoyable.
Cameras
A film camera is a light-tight box that holds film. A lens focuses the image, and a shutter controls how long light reaches it. Everything else, from meters to motors to autofocus, exists to make those two jobs easier. A fully mechanical camera from the 1970s and a modern point-and-shoot both take the same rolls of film and are capable of the same results.
Common types of film cameras
| Camera type | Best for | Example models |
|---|---|---|
| Point-and-shoot | Casual users, ease of use | Canon Sure Shot, Olympus mju |
| SLR | Manual control, interchangeable lenses | Nikon FM, Canon AE-1 |
| Rangefinder | Compact size, precise focusing | Leica M series, Canonet |
| TLR (twin-lens reflex) | Medium format on a budget, waist-level shooting | Yashica Mat-124G, Rolleiflex |
| Medium format | High image quality, professional use | Hasselblad 500, Mamiya RB67 |
| Instant cameras | Seeing the print straight away | Polaroid SX-70, Instax Mini |
| Box cameras | Learning with no settings | Kodak Brownie, Agfa Box |
Choosing your first camera
A 35mm SLR is the best camera to learn on. Film and spare parts are plentiful, lenses are cheap, and the manual controls make the relationship between aperture, shutter speed, and exposure easy to see.
A point-and-shoot suits you better if you would rather not think about settings at all. The trade-off is control: most decide exposure and focus for you, and few allow you to override them.
Medium format produces noticeably better image quality. The cameras are larger, the film costs more per frame, and a roll gives only 10 to 16 exposures. It rewards a slower way of working rather than a first roll.
Checking a second-hand camera works
Most film cameras are bought used, and many have sat unused for years. Before loading film into one, check the following:
- Shutter operation: fire the shutter at several speeds and ensure it opens and closes cleanly. Slow speeds that stick or sound sluggish usually mean the camera needs a service.
- Film advance mechanism: open the back and check the take-up spool turns when the shutter is fired and the film is advanced.
- Light seals: inspect the foam around the camera back. Perished, sticky seals let light in and fog the film, but they are inexpensive to replace.
- Lens condition: look for fog, fungus, or scratches that may affect image quality.
- Battery compartment: if the camera has electronics, check for corrosion and ensure it powers on.
Many cameras, especially mechanical ones, can function without batteries, but some require power for light meters or shutters to function correctly.
Film
Film is sold by format and by type. The format is the physical size of the roll, and it has to match your camera. The type sets the look of the image and how it is developed. A third property, speed, sets how much light the film needs.
Film formats
The choice of format affects both the level of detail and the overall cost of each image.
The most common formats still in production today include:
- 35mm: the most popular film format, used in everything from compact point-and-shoots to professional SLRs. The film comes sealed in a light-tight metal canister, which is what you load into the camera. Each roll gives 24 or 36 exposures and is easy to find and develop.
- 120 (medium format): a larger film format used in medium format cameras. There is no canister: the film is taped to a strip of opaque backing paper and wound onto an open spool. The paper is what keeps the light out. It offers higher image quality than 35mm and allows various aspect ratios, such as 6x6, 6x7, or 6x9. The number of exposures depends on the camera and frame size.
- Large format (4x5, 8x10 and larger): used where image quality matters more than convenience. The film comes as sheets, so each exposure is a separate piece. These cameras work on a tripod and give full control over focus and perspective.
- Instant film: available in formats such as Polaroid and Instax. The print develops in your hand a few minutes after the shot, and there is no negative to keep.
Some film formats, such as APS, 126, and Disc Film, are no longer in production, but expired rolls can sometimes be found from specialist sellers.
A camera takes one film format only
A 35mm roll will not fit a medium format camera, and 120 film will not fit a 35mm one.
Film types
There are three main types of photographic film, each with unique characteristics and its own development process:
| Film type | Look | Where to develop |
|---|---|---|
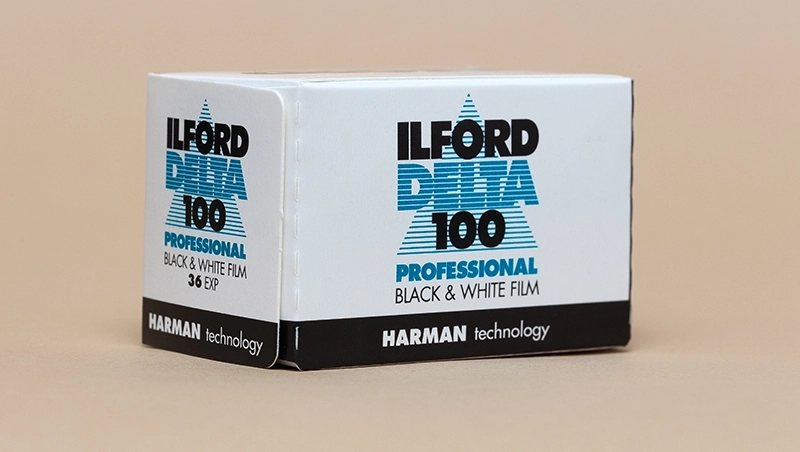
| Black & white | Tones of grey, contrasty next to colour | At home or a lab |
| Colour negative (C-41) | Natural colour | A lab, or a C-41 kit at home |
| Slide film (E-6) | Saturated colour, high contrast | Usually a lab |
Black & white is the most versatile film and the easiest to develop yourself. It needs three chemicals, and developer at room temperature works well. Only developer that is far too cold or far too hot is unusable.
Colour negative is the most common film in use. It is affordable, easy to find, and copes well if you give it too much light. It copes less well with too little. Development produces negatives, which are then scanned or printed.
Slide film, also known as positive or reversal film, produces a finished image on the film itself. There is no negative. The colours are striking, but exposure has to be accurate and development is more demanding.
Film speed (ISO)
ISO measures how sensitive film is to light. You'll find it on the box as 100, 200, 400, 800, or higher.
- ISO 100/200: bright daylight and outdoor shoots
- ISO 400: versatile choice for mixed indoor and outdoor light
- ISO 800+: low light, evenings, or indoor without flash
Lower ISO means finer grain and more detail. Higher ISO handles dark conditions but adds visible grain.
Unlike a digital camera, the speed is fixed for the whole roll. Choose it for the light you expect to be shooting in. When in doubt pick ISO 400, which copes with the widest range of conditions.
Choosing your first film
Developing at home? Start with black & white. It needs minimal equipment and the most forgiving process.
Using a lab? Colour negative (C-41) film is widely available, affordable, and tolerant of exposure mistakes.
Either way, start with a popular film: Ilford HP5 Plus or Kodak Tri-X for black & white, or Kodak Gold 200 for colour. A common film teaches you more than an unusual one. Consistency makes it far easier to tell whether an unexpected result came from the film, the camera, or you.
Flying with film
Many airports now use CT scanners for hand luggage, and these can fog film. Carry all your film in your hand luggage, never in a checked bag, which goes through stronger scanners.
A CT scanner can fog a whole roll
Put all your film, shot and unshot, in a clear zip-lock bag. At security, ask politely for it to be hand checked. Staff may still say no. Being friendly and making the check easy gives you the best chance.
Helpful tools
These tools are not essential but make shooting film easier and more reliable.
Light meter
Many older cameras have no meter, or one that no longer reads accurately. A handheld light meter or a phone metering app gives you a reliable exposure reading. How to use one is covered in exposing a scene.
Spare batteries
Cameras with electronic shutters or meters stop working the moment the battery dies. Older models often need cells that are hard to find locally, so carry a spare.
Storage for exposed film
Keep finished rolls cool, dry and out of the light until you develop them. See storing your film.
Air blower and cloth
A blower clears dust from the film chamber and lens without touching either. Avoid canned air, which can leave residue and blow dust deeper into the camera body.
A microfibre cloth cleans fingerprints off the lens. Use it only after blowing off the dust, so grit is not rubbed into the glass.
Tripod
A tripod holds the camera still for slow shutter speeds, below about 1/30s. A cheap one is fine to start with, or rest the camera on a wall or bag.
A notebook
Write down the settings for each frame. When the negatives come back, you can see which choices worked, and you learn much faster.